Easy Remote IoT Web SSH Server Tutorial: Setup Guide
Is the dream of seamless remote access and control of your IoT devices tantalizingly close, but the technical hurdles seem insurmountable? The promise of a remotely accessible web-based SSH server for your IoT projects is no longer a distant fantasy; it's a readily achievable reality, empowering you with unparalleled command and control capabilities. This tutorial will illuminate the path, guiding you through the steps to establish a secure and functional remote IoT web SSH server, transforming your projects from isolated islands of data to interconnected, manageable systems.
For years, the complexities of network configurations and secure remote access have been a major barrier to entry for many aspiring IoT developers. The thought of navigating firewalls, configuring SSH keys, and managing web server installations has deterred countless individuals from realizing the full potential of their connected devices. Fortunately, the landscape has evolved. Modern tools and techniques have streamlined the process, making it significantly easier to create a remote IoT web SSH server. This guide will present a step-by-step approach, breaking down the process into manageable chunks, and arming you with the knowledge you need to build a robust and secure remote access solution. Whether you are a hobbyist tinkering with smart home automation, or a professional deploying industrial sensors, the ability to access your devices remotely is essential. So lets delve into the mechanisms that will unlock your devices' potential, transforming your IoT setup from a localized arrangement to one that is accessible anytime, anywhere.
Before we embark on this technical journey, let's establish a foundational understanding. "remoteiot web ssh server tutorial" encapsulates the core elements of this endeavor. "remoteiot" signifies the focus on IoT devices. "web" points to the web-based interface we'll utilize. "ssh" stands for Secure Shell, the protocol ensuring secure communication. Finally, "server tutorial" provides the educational framework, giving us a clear roadmap. These elements will be interwoven throughout this article, providing a solid foundation for your remote access configuration. This tutorial is designed for individuals with varying levels of technical expertise. We will begin with basic concepts, ensuring that even newcomers can follow along. This is followed by instructions for more advanced users, allowing you to expand upon the foundation and tailor the configuration to your specific needs. Well be focusing on the essential tools and strategies to ensure the security and functionality of the setup. We aim to equip you with the skills you need to set up your very own remotely accessible IoT web SSH server, enabling secure and flexible control over your devices.
Now, let's delve into the concrete steps involved in building your remote IoT web SSH server. This tutorial will use the common `Ubuntu` operating system, which offers a balance of flexibility, a wide community support, and ease of use. This example is generally applicable to most `Linux` distributions, with minor modifications in commands. Consider the `Raspberry Pi`, which is a very popular single-board computer, ideal for IoT projects. It can be used to build a web SSH server, thanks to its portability and small form factor. The following instructions detail the essential steps. This is not an exhaustive list, and the best way to enhance your understanding is through hands-on practice and experimentation, which is where you will fine-tune the nuances and discover the full potential of this setup.
Let's begin with the installation and configuration of the web server. We are going to use the `Nginx` web server. It is known for its efficiency, versatility, and ease of use. Start by updating your system packages. Open your terminal and type the command `sudo apt update`. This command ensures you have the latest package information. After updating, install `Nginx` by typing `sudo apt install nginx`. Once the installation completes, `Nginx` should be running. To verify, open your web browser and enter your devices IP address. You should see the default `Nginx` welcome page. We will also need to configure `Node.js`, it is a very important component. `Node.js` is a JavaScript runtime environment which allows us to run server-side code, we need this for a web-based SSH interface. The steps involve adding the NodeSource repository, updating the package list, and installing `Node.js`. Execute the following commands: `curl -sL https://deb.nodesource.com/setup_16.x | sudo -E bash -`, `sudo apt update`, and `sudo apt install nodejs`. These commands will install the LTS version of `Node.js`. You can always verify the installation by running `node -v` to view the installed version.
Next, it is time to set up a web-based SSH interface. There are several options available, but we will look at a common choice: `Webmin`, which allows us to remotely manage servers. First, lets install `Webmin`. Start by downloading the latest version from the official `Webmin` website: `https://www.webmin.com/download/`. The installation process varies depending on your system. For `Ubuntu`, the command is as follows: `sudo apt install webmin`. This command will download and install `Webmin`. Once `Webmin` is installed, access the `Webmin` interface through your web browser using `https://your_server_ip:10000`. You will likely encounter a security warning. Accept the risk and proceed. You will be prompted to log in. Use the username and password of your device's user account. You can also install other options like `Terminator` or `Shellinabox`, but their installation methods vary. After you have successfully logged in, you will have access to a web-based user interface.
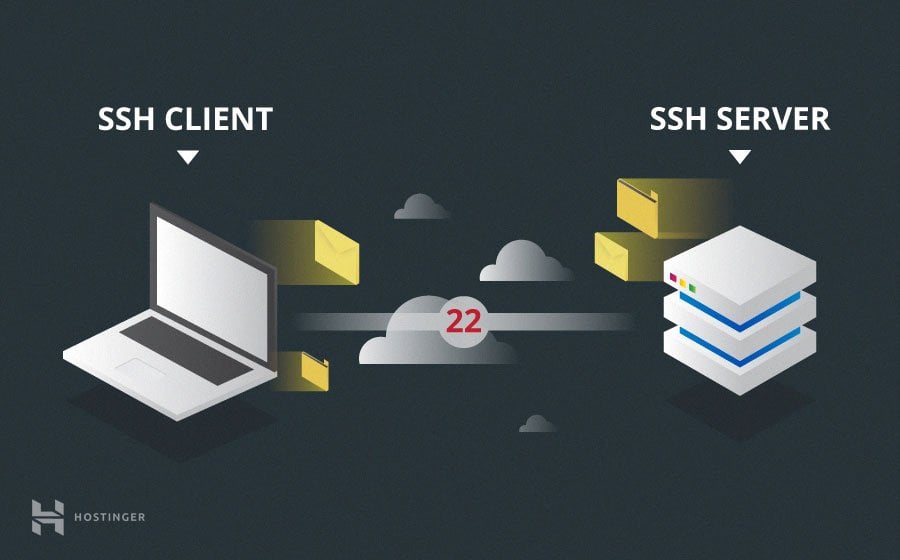
Security is the cornerstone of any remote access setup. We need to secure the SSH connection and the web server. The initial steps must involve securing the SSH server. The default SSH configuration is inherently insecure. First, change the default SSH port (22) to a more secure port. You can do this by editing the SSH configuration file at `/etc/ssh/sshd_config`. Use the `nano` or `vim` text editors to open this file: `sudo nano /etc/ssh/sshd_config`. Locate the line `#Port 22` and change it to `Port `, for example, `Port 2222`. Then, disable password authentication. In the same configuration file, find the `PasswordAuthentication yes` line and change it to `PasswordAuthentication no`. You will need to use SSH keys for authentication. Finally, disable root login, locate the `PermitRootLogin yes` line and change it to `PermitRootLogin no`. This adds an additional layer of protection against unauthorized access. Once you have made these changes, save the file and restart the SSH service using the command `sudo systemctl restart ssh`. Next, we have to use `fail2ban` to mitigate brute-force attacks on your SSH server. Install `fail2ban` using the command `sudo apt install fail2ban`. Once installed, `fail2ban` is typically configured to work. We need to adjust the `fail2ban` configuration, specifically the SSH jail. Edit the jail configuration file: `sudo nano /etc/fail2ban/jail.local`. Add or modify the `[sshd]` section to include settings. Set the `port = ssh`, set `filter = sshd`, set `logpath = /var/log/auth.log`, and `maxretry = 3`. This will configure `fail2ban` to ban an IP address after three failed login attempts. After making changes, restart `fail2ban` using `sudo systemctl restart fail2ban`. Remember to implement strong passwords or use SSH keys for your users. Regularly update your system and install security patches.
Setting up SSH keys is crucial for securing SSH access. Generate a key pair on your local machine: `ssh-keygen`. The command generates a public and private key pair. You will be prompted to save the keys. A default location is the `.ssh` directory in your home directory. Do not share your private key, and keep it secure. Then, you must copy your public key to your IoT device. Use the `ssh-copy-id` command or manually copy and paste the content of your public key into the `authorized_keys` file located in the `.ssh` directory of the user account on your IoT device. To use the `ssh-copy-id` command, run: `ssh-copy-id @`. This command will prompt you for the password for the user account on your IoT device. The public key will be added to the `authorized_keys` file. After this, you should be able to SSH into your device without a password. You must ensure that the permissions are correct for the `.ssh` directory and the `authorized_keys` file. The directory should have permissions of 700 and the file should have permissions of 600. You can set the permissions with the commands `chmod 700 ~/.ssh` and `chmod 600 ~/.ssh/authorized_keys`. These actions should safeguard the SSH access. You can now use the private key to connect to your device.
Now, consider the web server configuration. We will use `Nginx` and configure it for the secure reverse proxy to our web-based SSH interface. To do this, you need to create a new configuration file. In the `/etc/nginx/sites-available/` directory, create a new configuration file, such as `sudo nano /etc/nginx/sites-available/ssh`. Edit the file with the following content:
server {listen 80;listen [::]:80;server_name your_domain_or_ip;location / {proxy_pass http://localhost:10000; # Change 10000 to your Webmin port if necessaryproxy_set_header Host $host;proxy_set_header X-Real-IP $remote_addr;proxy_set_header X-Forwarded-For $proxy_add_x_forwarded_for;proxy_set_header X-Forwarded-Proto $scheme;}# Add SSL configuration if you have a certificate# Example:# listen 443 ssl;# ssl_certificate /path/to/your/certificate.crt;# ssl_certificate_key /path/to/your/private.key;}Replace `your_domain_or_ip` with your device's IP address or a domain name if you have one. Change the port 10000 to your web-based SSH interface port. Then, create a symbolic link to enable the site: `sudo ln -s /etc/nginx/sites-available/ssh /etc/nginx/sites-enabled/`. Finally, test the configuration with the command `sudo nginx -t` to check for errors. If there are no errors, restart `Nginx` using the command `sudo systemctl restart nginx`. This should configure the web server to serve as a reverse proxy. With this configuration, you can access your web-based SSH interface by entering your device's IP address or domain name in your web browser.
To enhance security further, we should secure the web traffic with HTTPS. This encrypts the communication between your browser and the web server. The process involves obtaining an SSL certificate. You can obtain free SSL certificates from `Let's Encrypt`. Install the `certbot` client using the command `sudo apt install certbot python3-certbot-nginx`. Then, run the following command to obtain the certificate: `sudo certbot --nginx -d your_domain_or_ip`. `Certbot` will guide you through the process. You will be prompted to provide an email address and agree to the terms of service. After successfully obtaining the certificate, `Certbot` will automatically configure `Nginx` to use the certificate. The configuration will be handled by the web server. You can verify the configuration by navigating to your domain or IP address in a web browser. The address should begin with `https://` and display a lock icon, indicating a secure connection. This is how you make your web traffic secure with `HTTPS`.
For more complex IoT projects, consider setting up port forwarding on your router. Port forwarding allows external traffic to reach your internal IoT device. Log in to your router's configuration page, which is usually accessible through your web browser with the IP address of your router, which is often `192.168.1.1` or `192.168.0.1`. You will need the administrator username and password. Look for the "Port Forwarding" or "Virtual Server" settings. You will then create a rule to forward traffic from a specific port on your router to the internal IP address and port of your IoT device. For example, you could forward external port 80 or 443 to your IoT device's internal IP address on port 80 or 443, respectively. Remember to use a secure port and only forward necessary ports. After setting up port forwarding, you can access your IoT device through your router's external IP address. You can find your router's external IP address by searching "what is my IP" in your web browser. Also, ensure that you use strong passwords on your router.
Now, we are going to discuss common troubleshooting steps. If you are unable to connect, you will have to start with the basics: First, check your internet connection. Make sure your device is connected to the internet. Then, verify the IP address. Ensure you are using the correct IP address of your IoT device. You can find the IP address using the command `ifconfig` or `ip addr` in your terminal. Check if the services are running. Use the command `sudo systemctl status ` to check if the SSH server, `Nginx`, and `Webmin` are running. Check firewall settings. The firewall may be blocking the required ports. Check your router configuration. Ensure that port forwarding is correctly configured and that the ports are open. For `Webmin`, check its settings and that it is configured to listen on the correct interface. If you still can't connect, check the logs. The system logs can give you clues about what went wrong. You can find the logs in the `/var/log` directory. Check the SSH server logs, `Nginx` logs, and the `Webmin` logs. If you have any errors while installing, check the documentation. The documentation and community forums can give you valuable insights. If you are still facing issues, consult online forums and communities. There are many online resources available to help you.
In addition to the initial setup, ongoing maintenance and security are essential for a reliable and secure remote IoT web SSH server. Regularly update your system packages. Use the command `sudo apt update` and `sudo apt upgrade` to keep your system up to date. This will ensure that security vulnerabilities are patched. Regularly back up your system. Backups can help you restore your system in the event of a failure or security breach. You should create a backup of your entire system. Monitor your system logs regularly. Check the logs for any unusual activity. Configure intrusion detection systems (IDS) and intrusion prevention systems (IPS). These systems can help detect and prevent security threats. Conduct regular security audits to identify and address any vulnerabilities. Use strong passwords or SSH keys for all user accounts. Avoid using default passwords. Limit access to your device. Only give access to authorized users and grant the minimum privileges necessary. Keep your software up to date. Make sure that you are using the latest versions of all software. Be aware of new security threats and vulnerabilities. Stay informed about the latest security threats and vulnerabilities. Follow industry best practices for secure remote access. Make sure you are always using the latest security standards. These ongoing security practices are the key to maintaining a safe, remote access setup.
The remoteiot web ssh server tutorial is just a starting point. Once you have the basic setup in place, you can expand your remote access capabilities to include monitoring and control of your IoT devices. You can then integrate web-based monitoring. You can build a web interface that displays data from your IoT devices. This can include sensor readings, device status, and other relevant information. Integrate remote control. You can add controls to your web interface, allowing you to control your IoT devices remotely. This can include turning devices on or off, adjusting settings, and initiating actions. Also integrate alerts and notifications. Implement alert mechanisms to notify you of important events. Set up email or SMS notifications for critical conditions, such as high sensor readings or device failures. Integrate with cloud platforms. You can integrate your remote access setup with cloud platforms such as `AWS`, `Azure`, or `Google Cloud`. You can upload data to the cloud, store it, and analyze it. Customize your interface. Design a custom web interface tailored to your specific needs. Use HTML, CSS, and JavaScript to create an interface that is easy to use and meets your requirements. Automate tasks. Use scripting languages, such as Python, to automate tasks. Automate repetitive tasks, such as data collection and device control. Implement data analytics. Use data analytics tools to analyze the data from your IoT devices. Identify trends, patterns, and insights. This can help you optimize your systems and make informed decisions. These are a few options to extend and enrich your remote access setup.
As we conclude this comprehensive guide, the establishment of a remote IoT web SSH server, although initially appearing complex, is now achievable through careful planning and the right tools. The key is a thorough understanding of the steps involved, from initial system configuration, to security implementation and maintenance. Following this tutorial, you have set the foundation for a fully operational remote access setup. This setup enables you to connect, control, and monitor your IoT devices. Remember, the best way to learn is through experimentation. Take this tutorial as a starting point, and adapt it to your specific needs. As your understanding grows, you can add advanced features like integrating with cloud platforms, setting up data analytics, and building custom interfaces. By embracing these steps and committing to constant learning, you are not only building a remote access solution, but you are entering the exciting world of IoT. Your ability to monitor, manage, and adapt your IoT devices remotely puts you in control. Continue to build and experiment. The possibilities are endless, and the future of connected devices is in your hands.


